Server Side Rendering Relay with Next.js & gqlgen
Learn how to setup an E2E GraphQL Application using Next.js, gqlgen, and Relay. We'll create a development environment in Docker + Docker Compose and make a basic todo list
Disclaimer This post is long. If you're just interested in how to setup SSR with Relay, you're probably better off just reading through the source code on the repo
👷 What we'll be building today
- a next.js powered frontend with Relay for data fetching (all SSR).
- a gqlgen powered backend using postgres for a datastore
- a traefik powered reverse proxy
I'll show you how to setup an E2E GraphQL application. You get all the goodies. E2E Type Safety, Server Side Rendering with Next.js, and TypeScript. Need I say more?
🐳 Developing in Docker?
👍 Pros
- Mirrors your production environment closely
- Portable to all of your machines without worry
- Quick startup of all services
- Easy for new engineers to onboard
- Deploying is a breeze 💨
👎 Cons
- Some overhead from docker
- Must execute commands in the right container
- Complexity (what the fuck even is this blog post)
📝 Example Project
All the code for this project will be hosted in this repo if you want to run it for yourself / browse the code.
I'm a big fan of monorepos so everything we build today will be in a single github repo. Each part of the stack will get its own subdirectory (web & api).
🔨 Creating the project
I keep all of my projects in ~/Code so assume that's our root directory.
mkdir ~/Code/docker-compose-example;
git init;
git remote add origin https://github.com/tbezman/docker-compose-example
🐳 Setting up docker compose with traefik
I like to keep all of my build files separate from the source code of the project itself. So let's create a few files / directories
cd ~/Code/docker-compose-example;
touch docker-compose.yml;
mkdir build/development;
touch build/development/Dockerfile-api;
touch build/development/Dockerfile-web;
When developing, I like to access my services via domain, to do so, we'll have to update our
/etc/hosts file to remap a few domains to localhost. I've added the following entries for the
services we'll be working with in this post.
127.0.0.1       web.todo.com
127.0.0.1       api.todo.com
127.0.0.1       grafana.todo.com
127.0.0.1       traefik.todo.com
Now let's update our docker-compose.yml to contain the following
version: '3'

services:
  reverse-proxy:
    image: traefik:v2.0
    command: traefik --api.insecure=true --providers.docker
    environment:
      - exposedByDefault=false
    ports:
      - '80:80'
    volumes:
      - /var/run/docker.sock:/var/run/docker.sock
    labels:
      - traefik.http.routers.traefik.rule=Host(`traefik.todo.com`)
      - traefik.http.services.traefik.loadbalancer.server.port=8080
Sweet, let's go over what we've just done
- Created a new service called
reverse-proxyusing the traefik image - Configured the startup command to run without
httpsand usedockeras the provider (this lets traefik know we're running in a docker environment) - Disabled
exposedByDefaultsince we want to manually expose each service - Added a label to tell
traefikwe want to be able to see this service at thetraefik.todo.comdomain. - Added another label to tell
traefikthat we wanttraefik.todo.comto point to port8080on this service
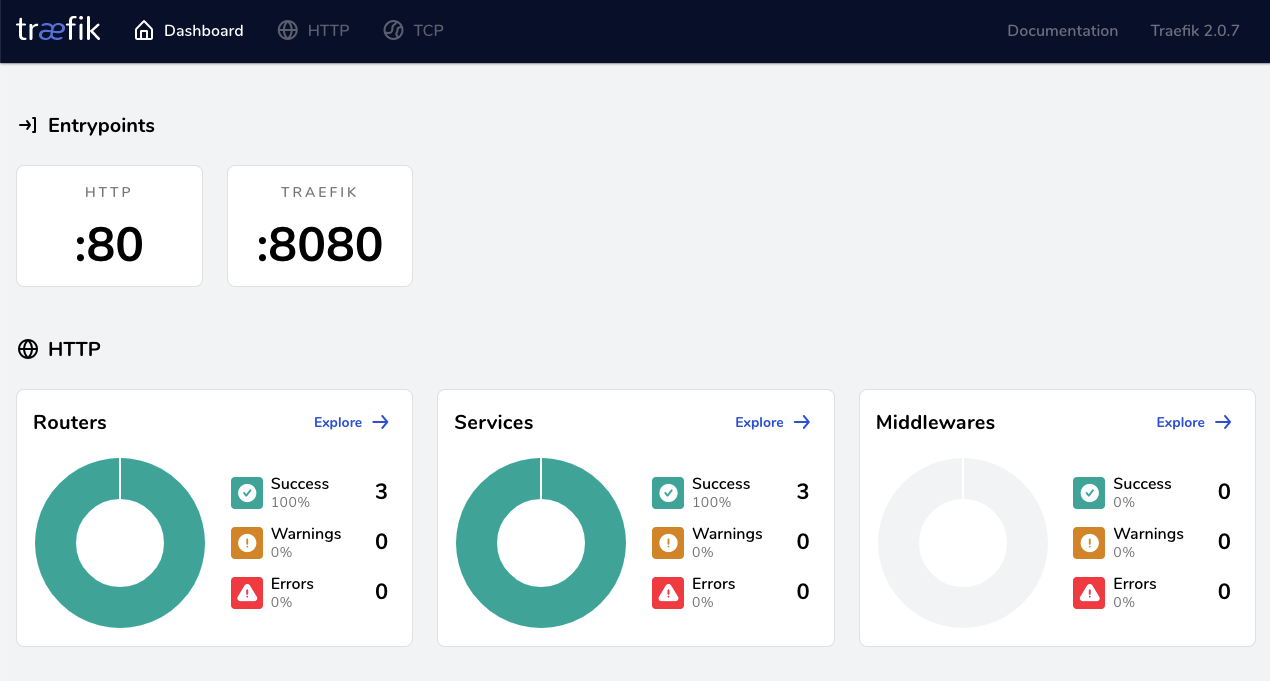
Now we can access the traefik web UI by visiting http://traefik.todo.com in the browser!
Okay, this is a good start, let's move on to some application code and come back to docker compose later
📄 Adding a schema file
Let's add a schema.graphql to the root of our project. We want this file at the root, so it can be
shared across the backend and the frontend.
Here's what the schema looks like
type Todo {
  id: ID!
  title: String!
  description: String!
  completed: Boolean!
  createdDate: String!
}

type Query {
  todos: [Todo!]!
}

input CreateTodoInput {
  title: String!
  description: String!
}

type Mutation {
  createTodo(input: CreateTodoInput!): Todo!

  completeTodo(id: ID!): Todo!
}
🕸 Setting up gqlgen
gqlgen is freaking amazing. You get to use golang on the backend, a dead simple language which leaves no room for developers to get clever. Here's a few things I love about gqlgen
- Generates code based on your schema
- Comes with a GraphQL playground out of the box
- Comes with a batch query system to avoid n+1 query problems
- Has an awesome developer ecosystem (they're always improving things)
First, we'll start by creating our api directory, and initializing a gqlgen project
# Create the api directory
mkdir api;
cd api;

# Create a go module pointed at the api subdirectory of our github repo
go mod init github.com/tbezman/docker-compose-example/api

# Install gqlgen
go get github.com/99designs/gqlgen;

# Initialize the project
go run github.com/99designs/gqlgen init;
Now, let's delete the schema that comes out of the box.
rm ~/Code/docker-compose-example/api/graph/schema.graphqls
Then we'll update gqlgen.yml to point to the schema at the root of the project
 # Where are all the schema files located? globs are supported eg  src/**/*.graphqls
 schema:
-  - graph/*.graphqls
+  - ../schema.graphql

 # Where should the generated server code go?
 exec:
You also have to add the following to resolvers.go so when we run go generate, go picks up that
gqlgen has work to do.
 package graph

+//go:generate go run github.com/99designs/gqlgen
+
 // This file will not be regenerated automatically.
 //
 // It serves as dependency injection for your app, add any dependencies you require here.
Then we can run the following to get gqlgen to automatically create the functions in our
schema.resolvers.go file, so we can start implementing our queries!
cd ~/Code/docker-compose-example/api;
go generate ./...;
Boom, all the code for our schema has been generated!
Okay, now we need to configure a database, so we can persist / query from our resolvers in gqlgen.
First we'll update server.go to connect using gorm.
@@ -5,6 +5,9 @@ import (
 	"net/http"
 	"os"

+	"github.com/jinzhu/gorm"
+	_ "github.com/jinzhu/gorm/dialects/postgres"
+	"github.com/tbezman/docker-compose-example/api/graph/model"
+
 	"github.com/99designs/gqlgen/graphql/handler"
 	"github.com/99designs/gqlgen/graphql/playground"
 	"github.com/tbezman/docker-compose-example/api/graph"
@@ -19,7 +22,15 @@ func main() {
 		port = defaultPort
 	}

-	srv := handler.NewDefaultServer(generated.NewExecutableSchema(generated.Config{Resolvers: &graph.Resolver{}}))
+	database, err := gorm.Open("postgres", "host=postgres port=5432 user=todo dbname=todo password=todo sslmode=disable")
+
+	if err != nil {
+		panic("could not connect to database")
+	}
+
+	database.AutoMigrate(&model.Todo{})
+
+	srv := handler.NewDefaultServer(generated.NewExecutableSchema(generated.Config{Resolvers: &graph.Resolver{
+		Database: database,
+	}}))

 	http.Handle("/", playground.Handler("GraphQL playground", "/query"))
 	http.Handle("/query", srv)
Note that the connection string's host is
postgres. This will be the name of the container in docker. This is how docker does networking, the hostname is the actual name of the container
Don't forget to run
go mod tidyto make sure your go mod has an up to date dependency list
Then, we'll update the resolver.go file to accept the new field we just passed.
@@ -1,9 +1,13 @@
 package graph

+import "github.com/jinzhu/gorm"
+
 //go:generate go run github.com/99designs/gqlgen

 // This file will not be regenerated automatically.
 //
 // It serves as dependency injection for your app, add any dependencies you require here.

-type Resolver struct{}
+type Resolver struct {
+	Database *gorm.DB
+}
😔 Supporting CORS
Since our frontend will make some API calls, we need to make sure our server allows for that. We'll do so using chi router. This is what gqlgen recommends on their website. Make the following changes and you'll be good to go with CORS
@@ -1,6 +1,8 @@
 package main

 import (
+	"github.com/go-chi/chi"
+	"github.com/rs/cors"
 	"log"
 	"net/http"
 	"os"
@@ -23,6 +25,17 @@ func main() {
 		port = defaultPort
 	}

+	router := chi.NewRouter()
+
+	// Add CORS middleware around every request
+	// See https://github.com/rs/cors for full option listing
+	router.Use(cors.New(cors.Options{
+		AllowedOrigins:   []string{"http://web.todo.com"},
+		AllowCredentials: true,
+		Debug:            true,
+	}).Handler)
+
+
 	database, err := gorm.Open("postgres", "host=postgres port=5432 user=todo dbname=todo password=todo sslmode=disable")

 	if err != nil {
@@ -35,9 +48,9 @@ func main() {
 		Database: database,
 	}}))

-	http.Handle("/", playground.Handler("GraphQL playground", "/query"))
-	http.Handle("/query", srv)
+	router.Handle("/", playground.Handler("GraphQL playground", "/query"))
+	router.Handle("/query", srv)

 	log.Printf("connect to http://localhost:%s/ for GraphQL playground", port)
-	log.Fatal(http.ListenAndServe(":"+port, nil))
+	log.Fatal(http.ListenAndServe(":"+port, router))
 }
🐳 Setting up docker-compose to run the API
Remember, we made a few docker files before. Let's update the development api Dockerfile to contain
the following. This files lives at build/development/Dockerfile-api
FROM golang:1.15

RUN go get github.com/githubnemo/CompileDaemon

WORKDIR /project

CMD ["bash", "-c", "go get ./...; exec CompileDaemon -command=./api"]
This Dockerfile uses CompileDaemon to watch our
source code, then re-build and re-run whenever the code changes. This is a great tool for DX. The
way that command is working is CompileDaemon will build server.go and generate a binary named
api based on the directory name, so we just tell the CompileDaemon to run ./api whenever the
changes occur.
Okay, now let's update our docker-compose.yml to include the api as a service proxied behind
traefik.
@@ -13,3 +13,15 @@ services:
     labels:
       - traefik.http.routers.traefik.rule=Host(`traefik.todo.com`)
       - traefik.http.services.traefik.loadbalancer.server.port=8080
+
+  api:
+    depends_on:
+      - reverse-proxy
+    volumes:
+      - ./api:/project
+    build:
+      context: .
+      dockerfile: ./build/development/Dockerfile-api
+    labels:
+      - traefik.http.routers.api.rule=Host(`api.todo.com`)
+      - traefik.http.services.api.loadbalancer.server.port=8080
The only interesting thing about the above config, is we've told docker-compose to mount our api
directory to /project inside of the container. This is the magic, this is how the CompileDaemon
can watch for changes on our local machine without having to rebuild the docker image 🧠.
Okay, now let's try to start up the project!
docker-compose up

2021/03/20 23:59:57 Running build command!
2021/03/20 23:59:57 Build ok.
2021/03/20 23:59:57 Restarting the given command.
2021/03/20 23:59:57 stderr: panic: could not connect to database
2021/03/20 23:59:57 stderr:
2021/03/20 23:59:57 stderr: goroutine 1 [running]:
2021/03/20 23:59:57 stderr: main.main()
2021/03/20 23:59:57 stderr:  /project/server.go:28 +0x475
😬 We never set up our database, so our api server has nothing to connect to. Let's fix this.
@@ -14,8 +14,21 @@ services:
       - traefik.http.routers.traefik.rule=Host(`traefik.todo.com`)
       - traefik.http.services.traefik.loadbalancer.server.port=8080

+  postgres:
+    image: postgres
+    user: root
+    volumes:
+      - ./postgres:/var/lib/postgres/data
+    ports:
+      - 5432:5432
+    environment:
+      - POSTGRES_USER=todo
+      - POSTGRES_PASSWORD=todo
+      - POSTGRES_DATABASE=todo
+
   api:
     depends_on:
+      - postgres
       - reverse-proxy
     volumes:
       - ./api:/project
We don't need to put this behind traefik since we don't want the outside world to access our database 🤣
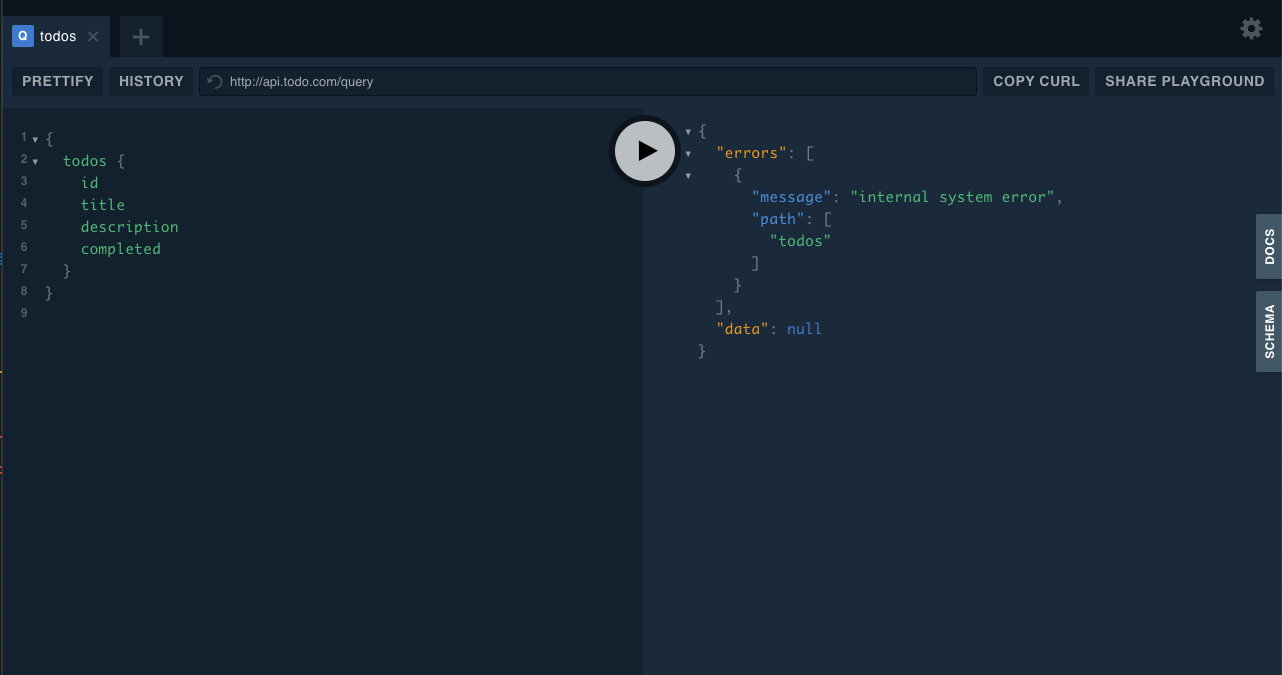
Sweet, so now we can run docker-compose up and you should be able to access the GraphQL Playground
at http://api.todo.com
🧑💻 Implementing our resolvers
Now that we have a running server, let's implement our resolvers to actually use our postgres
database! I've updated schema.resolvers.go with the following code. You can customize this however
you'd like.
@@ -6,21 +6,52 @@ package graph
 import (
 	"context"
 	"fmt"
+	"time"

+	"github.com/dgryski/trifles/uuid"
 	"github.com/tbezman/docker-compose-example/api/graph/generated"
 	"github.com/tbezman/docker-compose-example/api/graph/model"
 )

 func (r *mutationResolver) CreateTodo(ctx context.Context, input model.CreateTodoInput) (*model.Todo, error) {
-	panic(fmt.Errorf("not implemented"))
+	todo := &model.Todo{
+		ID:          uuid.UUIDv4(),
+		Title:       input.Title,
+		Description: input.Description,
+		Completed:   false,
+		CreatedDate: time.Now().Format(time.RFC3339),
+	}
+
+	if err := r.Database.Save(todo).Error; err != nil {
+		return nil, fmt.Errorf("could not save todo")
+	}
+
+	return todo, nil
 }

 func (r *mutationResolver) CompleteTodo(ctx context.Context, id string) (*model.Todo, error) {
-	panic(fmt.Errorf("not implemented"))
+	var err error
+
+	if err = r.Database.Model(&model.Todo{}).Where("id = ?", id).Update("completed", true).Error; err != nil {
+		return nil, fmt.Errorf("could not update todo with completed true")
+	}
+
+	foundTodo := &model.Todo{}
+	if err = r.Database.Where("id = ?", id).First(foundTodo).Error; err != nil {
+		return nil, fmt.Errorf("could not find todo after updating")
+	}
+
+	return foundTodo, nil
 }

 func (r *queryResolver) Todos(ctx context.Context) ([]*model.Todo, error) {
-	panic(fmt.Errorf("not implemented"))
+	var todos []*model.Todo
+
+	if err := r.Database.Find(&todos).Error; err != nil {
+		return nil, fmt.Errorf("could not get all todos")
+	}
+
+	return todos, nil
 }

 // Mutation returns generated.MutationResolver implementation.
I tested all of this out in the Playground to make sure all worked well. Maybe we'll cover unit tests in a followup blog post
Alright, now we've gotten our backend setup and working. Let's move on to setting up the frontend with Relay to consume our GraphQL backend.
😍 Next.js + Relay
Next.js comes with a great set of starter projects which you can browse
here. I ❤️ TypeScript, so we'll start
with the
typescript-eslint-jest
example
In our root directory, we'll create the project by running the following.
yarn create next-app --example with-typescript-eslint-jest web
Great, now we have a next.js project to work with. I'm not sure why, but the next.js starter
projects don't come with the
rules-of-hooks eslint plugin out of the
box. Let's add that
yarn add eslint-plugin-react-hooks --dev
then make the following change to your .eslintrc.json
 {
   "parser": "@typescript-eslint/parser",
-  "plugins": ["@typescript-eslint"],
+  "plugins": ["@typescript-eslint", "react-hooks"],
   "extends": [
     "eslint:recommended",
     "plugin:react/recommended",
     }
   },
   "rules": {
+    "react-hooks/rules-of-hooks": "error",
+    "react-hooks/exhaustive-deps": "warn",
     "react/react-in-jsx-scope": 0,
     "react/display-name": 0,
     "react/prop-types": 0,
📈 Adding Relay
Okay, this is kind of a trip, so strap in. First, we'll have to add a few dependencies.
yarn add -D relay-config relay-compiler relay-compiler-language-typescript graphql babel-plugin-relay @types/react-relay
yarn add react-relay
Now, you'll have to add the following to your .babelrc
{
  "//": "Rest of your babelrc (don't copy this line)",
  "plugins": ["relay"]
}
Then, we'll add a relay.config.js to our web directory with the following inside
module.exports = {
  src: '.',
  language: 'typescript',
  schema: '../schema.graphql',
  exclude: ['**/node_modules/**', '**/__generated__/**'],
}
Then, we'll update our package.json to include a script relay to run the relay compiler
{
  "relay": "relay-compiler"
}
You can test this by running yarn relay
🐳 Adding the web service to our docker compose
Okay, let's get ready to run the next js dev server in docker. Remember, before we created a
Dockerfile at build/development/Dockerfile-web. Head into that file and add the following.
FROM node:14

WORKDIR /project

CMD ["bash", "-c", "yarn && yarn dev -p 4000 -H 0.0.0.0"]
This is very similar to our api docker file except we run node stuffs in here.
Now, let's update our docker-compose.yml to include the new service.
web:
  depends_on:
    - api
    - reverse-proxy
  volumes:
    - ./web:/project
  build:
    context: .
    dockerfile: ./build/development/Dockerfile-web
  labels:
    - traefik.http.routers.web.rule=Host(`web.todo.com`)
    - traefik.http.services.web.loadbalancer.server.port=4000
Sweet, now you can run docker-compose up and you should see the next starter page at
http://web.todo.com
🧠 Server Side Rendering w/ Relay
This part is really dope. I haven't seen a lot about this on the internet so hopefully you can benefit from this.
Okay we need to do a few things here so bear with me.
- We need to create a relay environment on the server
- Make any queries we need for the client on the server
- Serialize the relay environment, and send it down to the frontend
Then on the client, we need to do the following
- Grab the serialized relay data
- Initialize a new environment with that serialized data
- Render our components as per usual
First, let's create a utility file in utils/RelayEnvironment.ts with the following inside
import { Environment, Network, RecordSource, Store } from 'relay-runtime'
import { RecordMap } from 'relay-runtime/lib/store/RelayStoreTypes'

const getFetchUrl = (): string => {
  if (process.browser) {
    // Connect to the service via domain name when on the client
    return 'http://api.todo.com/query'
  } else {
    // Connect directly to the service in docker when on the server
    return 'http://api:8080/query'
  }
}

async function fetchGraphQL(params, variables) {
  const response = await fetch(getFetchUrl(), {
    method: 'POST',
    headers: {
      'Content-Type': 'application/json',
    },
    body: JSON.stringify({
      query: params.text,
      variables,
    }),
  })

  return await response.json()
}

export const serializeRelayEnvironment = (environment: Environment) => {
  return environment.getStore().getSource().toJSON()
}

export const createRelayEnvironment = (records: RecordMap): Environment => {
  return new Environment({
    store: new Store(new RecordSource(records)),
    network: Network.create(fetchGraphQL),
  })
}
Next, we need to create an _app.tsx file in the web/pages directory to pull our serialized data
from the server and initialize a Relay Environment for the client with the data already in the cache
import * as React from 'react'
import { RelayEnvironmentProvider } from 'react-relay'
import { Environment } from 'relay-runtime'
import { RecordMap } from 'relay-runtime/lib/store/RelayStoreTypes'
import { createRelayEnvironment } from '../utils/RelayEnvironment'

type AppProps = {
  Component: React.ComponentType
  pageProps: Record<string, unknown>
}

const App: React.FC<AppProps> = ({ Component, pageProps }) => {
  // Initialize the relay environment in state so its guaranteed not to change
  const [relayEnvironment] = React.useState<Environment>(() =>
    createRelayEnvironment(pageProps.relayRecords as RecordMap)
  )

  return (
    <RelayEnvironmentProvider environment={relayEnvironment}>
      <Component {...pageProps} />
    </RelayEnvironmentProvider>
  )
}

export default App
Okay, that's everything we need to setup SSR for Relay. That's fucking amazing! Now let's put it to
use. I'm going to create two new files in the web/components directory.
The first one is TodoRow.tsx which contians the following
import * as React from 'react'
import { graphql, useFragment } from 'react-relay'
import { TodoRowFragment$key } from './__generated__/TodoRowFragment.graphql'

type TodoProps = {
  todoRef: TodoRowFragment$key
}

export const Todo: React.FC<TodoProps> = ({ todoRef }) => {
  const { title, description, createdDate, completed } = useFragment(
    graphql`
      fragment TodoRowFragment on Todo {
        title
        description
        completed
        createdDate
      }
    `,
    todoRef
  )

  return (
    <li>
      <div>
        <strong>Title:</strong>
        {title}
      </div>
      <div>
        <strong>Description:</strong>
        {description}
      </div>
      <div>
        <strong>Created Date:</strong>
        {createdDate}
      </div>
      <div>
        <strong>Completed</strong>
        {completed ? 'Yes' : 'No'}
      </div>

      {!completed && <button>Complete</button>}
    </li>
  )
}
Then, I'll create the next file TodoList.tsx which contains the following
import * as React from 'react'
import { graphql, useLazyLoadQuery } from 'react-relay'
import { Todo } from './TodoRow'
import { TodoListQuery } from './__generated__/TodoListQuery.graphql'

export const TodoListQueryTaggedNode = graphql`
  query TodoListQuery {
    todos {
      id
      ...TodoRowFragment
    }
  }
`

export const TodoList: React.FC = () => {
  const { todos } = useLazyLoadQuery<TodoListQuery>(TodoListQueryTaggedNode, {})

  return (
    <ul>
      {todos.map((todo) => {
        return <Todo key={todo.id} todoRef={todo} />
      })}
    </ul>
  )
}
Pretty sweet, we've got TodoRow which defines its own data requirements which bubble up to the
root query using fragments.
Don't forget to run
yarn relayto get the auto generated files
Now let's update web/pages/index.tsx to contain the following
import { TodoList, TodoListQueryTaggedNode } from '../components/TodoList'
import { createRelayEnvironment, serializeRelayEnvironment } from '../utils/RelayEnvironment'
import { fetchQuery } from 'relay-runtime'

export const Home = (): JSX.Element => {
  return (
    <div>
      <h1>Todo List</h1>
      <TodoList />
    </div>
  )
}

Home.getInitialProps = async () => {
  const environment = createRelayEnvironment({})

  await fetchQuery(environment, TodoListQueryTaggedNode, {}).toPromise()

  return {
    relayRecords: serializeRelayEnvironment(environment),
  }
}

export default Home
What's important to note here is we have a getInitialProps which calls fetchQuery on our
TodoListQueryTaggedNode Once that request is completed, we serialize the relay environment and
send it down to the client.
Now can visit the site again to see we've got real data get Server side rendered!
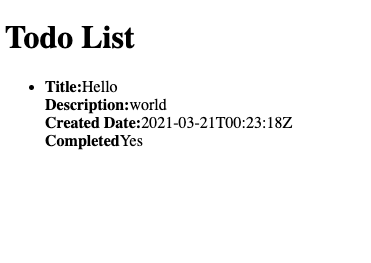
I have test data from when I was testing in the GraphQL Playground
🧬 Adding in some mutations
We've got a basic todo list rendering, but let's add the ability add / complete a todo
Let's update TodoList.tsx with a form which upon submission, calls a relay mutation, and when that
mutation completes, we'll refresh our todo list so we have the most up to date data
@@ -1,7 +1,14 @@
 import * as React from 'react'
-import { graphql, useLazyLoadQuery } from 'react-relay'
+import {
+  graphql,
+  useLazyLoadQuery,
+  useMutation,
+  useRelayEnvironment,
+} from 'react-relay'
 import { Todo } from './TodoRow'
 import { TodoListQuery } from './__generated__/TodoListQuery.graphql'
+import { TodoListCreateTodoMutation } from './__generated__/TodoListCreateTodoMutation.graphql'
+import { fetchQuery } from 'relay-runtime'

 export const TodoListQueryTaggedNode = graphql`
   query TodoListQuery {
@@ -13,13 +20,69 @@ export const TodoListQueryTaggedNode = graphql`
 `

 export const TodoList: React.FC = () => {
+  const relayEnvironment = useRelayEnvironment()
   const { todos } = useLazyLoadQuery<TodoListQuery>(TodoListQueryTaggedNode, {})

+  const [createTodo] = useMutation<TodoListCreateTodoMutation>(graphql`
+    mutation TodoListCreateTodoMutation(
+      $title: String!
+      $description: String!
+    ) {
+      createTodo(input: { title: $title, description: $description }) {
+        id
+      }
+    }
+  `)
+
+  const handleSubmit: React.FormEventHandler<HTMLFormElement> = React.useCallback(
+    async (event) => {
+      event.preventDefault()
+
+      const data = new FormData(event.currentTarget)
+
+      event.currentTarget.reset()
+
+      createTodo({
+        variables: {
+          title: data.get('title').toString(),
+          description: data.get('description').toString(),
+        },
+        async onCompleted() {
+          await fetchQuery(
+            relayEnvironment,
+            TodoListQueryTaggedNode,
+            {}
+          ).toPromise()
+        },
+      })
+    },
+    [createTodo, relayEnvironment]
+  )
+
   return (
-    <ul>
-      {todos.map((todo) => {
-        return <Todo key={todo.id} todoRef={todo} />
-      })}
-    </ul>
+    <>
+      <form onSubmit={handleSubmit}>
+        <div>
+          <label>Title</label>
+          <div>
+            <input type="text" name="title" />
+          </div>
+        </div>
+
+        <div>
+          <label>Description</label>
+          <div>
+            <textarea name="description" />
+          </div>
+        </div>
+
+        <button>Create Todo</button>
+      </form>
+      <ul>
+        {todos.map((todo) => {
+          return <Todo key={todo.id} todoRef={todo} />
+        })}
+      </ul>
+    </>
   )
 }
Then, we'll update TodoRow.tsx to mark a todo as completed. What's awesome about Relay is we don't
need to refresh the entire TodoListQuery to get the updated data on the client. Relay will
automatically merge the updated data into the cache.
@@ -1,5 +1,5 @@
 import * as React from 'react'
-import { graphql, useFragment } from 'react-relay'
+import { graphql, useFragment, useMutation } from 'react-relay'
 import { TodoRowFragment$key } from './__generated__/TodoRowFragment.graphql'

 type TodoProps = {
@@ -7,9 +7,10 @@ type TodoProps = {
 }

 export const Todo: React.FC<TodoProps> = ({ todoRef }) => {
-  const { title, description, createdDate, completed } = useFragment(
+  const { id, title, description, createdDate, completed } = useFragment(
     graphql`
       fragment TodoRowFragment on Todo {
+        id
         title
         description
         completed
@@ -19,6 +20,22 @@ export const Todo: React.FC<TodoProps> = ({ todoRef }) => {
     todoRef
   )

+  const [completeTodo] = useMutation(graphql`
+    mutation TodoRowCompleteTodoMutation($id: ID!) {
+      completeTodo(id: $id) {
+        completed
+      }
+    }
+  `)
+
+  const handleComplete = React.useCallback(() => {
+    completeTodo({
+      variables: {
+        id,
+      },
+    })
+  }, [completeTodo, id])
+
   return (
     <li>
       <div>
@@ -38,7 +55,7 @@ export const Todo: React.FC<TodoProps> = ({ todoRef }) => {
         {completed ? 'Yes' : 'No'}
       </div>

-      {!completed && <button>Complete</button>}
+      {!completed && <button onClick={handleComplete}>Complete</button>}
     </li>
   )
 }
🤔 Conclusion
This blog post started out as how to develop using docker-compose, but it really spiraled into how
to setup a full stack GraphQL repository / how to do SSR with Relay and Next.js. I think I'll update
the title to something more in line with that.
If you have any questions, don't be afraid to reach out on Twitter.